SESSION
5 Ways to Simply Add Media Accessibility (m16y) to your Jamstack app
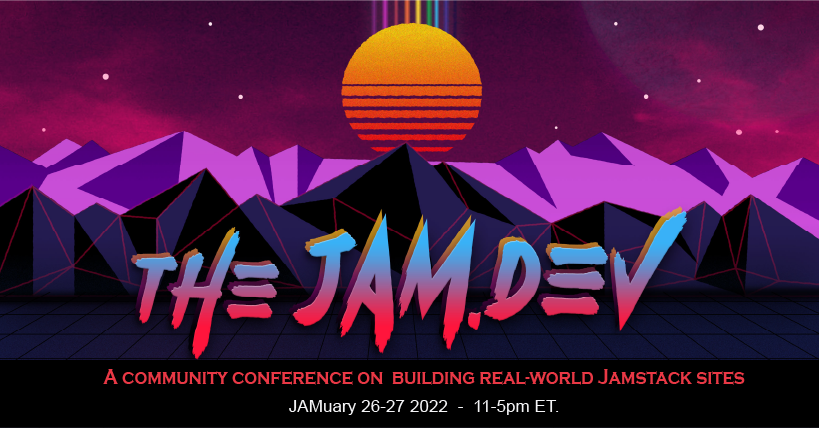
TheJam.dev is a 2-day virtual conference focused on building real-world applications using the Jamstack.
 Tessa Mero
&
Tessa Mero
&
Have you ever been on a slow internet connection and tried to load a video or stream and it’s frozen?
Adaptive Bitrate Streaming is a video delivery technique that adjusts the quality of a video stream in real time according to detected bandwidth and CPU capacity.
As a developer, you have to make it a priority to make videos more accessible for the viewer to be able to start videos more quickly, with fewer buffer interruptions, and provide them the best possible quality for their current device and network connection, to maximize their user experience and minimize viewer drop-off rate.
In this presentation, I will show you different APIs you can use to make it easy to implement ABS as well as show you a code sample on codesandbox of adaptive bitrate streaming in action.
Tessa Mero is a Developer Advocate at Cloudinary. She regularly organizes meetups, such as APIs, Vue.js, JAMStack, and Developer Relations. In the past, she has contributed to a leadership team for the open source Joomla! Project for 5 years, including the board of directors, leading the production team, as well as evangelizing Joomla as a public speaker. She organized a PHP conference and founded the API City Conference. She also is an avid career mentor and has helped countless developers become successful. In her free time, she likes to play video games, go camping, cooking, and eating KBBQ.
Tessa Mero: [00:00:00] The biggest inspiration behind this presentation was about two, two developers in the last month asked me about how to work with adaptive bit rate streaming, and that is a new area for me and there’s just so many different like capabilities that videos can do. So I started doing a lot of reading on it and.
And then I asked others developers like, Hey, how do you work with abs? And I get a lot of the same responses. What is that exactly? And now I’m, I was inspired to put together some slides and educate devs on the basics of abs and how to work with it. So I am excited to go. So I’ll start out the presentation with some video consumer stats to get an understanding of why it’s important to work with abs and a little information about [00:01:00] adapt bit rate streaming, which I’ll say abs for short and what resolution is.
Bit rate formats, video codex and a Cloudinary API demo and hopefully have time for a max API demo.
There will be over 248.9 million individuals by 2022 who watch video related content on the web. The number is increasing by five to 10 million people a year. I think it’s a lot more than that, but that’s just reported numbers and will eventually increase exponentially as technology advances and video becomes the primary, immediate experience on the web.
This is based on the data from St 2021. They actually have a lot of interesting statistics and data about different web topics that they release every year. So I had a lot of fun reading, a lot of different. Pages that was released [00:02:00] by them. So definitely check out sata. They have a lot of good marketing data too.
Another interesting data I found during a late night binge of looking up stats on video, I spent a lot of hours doing that for fun. 85% of all internet users in the US watched online video content monthly on any of their devices. , and that was like 2018 data. I couldn’t find any 2021 data, but I’m sure that’s coming up soon.
By 2022 online videos will make up more than 82% of all consumer internet traffic in the world. That’s 15 times higher than what it was in 2017, and this was reported by Cisco Systems and. Definitely that’s going to be increasing. Exponentially. Over 50% of viewers will close a video within 90 seconds.[00:03:00]
If it isn’t good quality, how long until you close out a video that’s not loading properly? I don’t have that kind of patience. I like when I load a video and it’s like it’s still buffering, or if it’s frozen, I just close it out immediately and find another one to view, so it, it drives me crazy.
Viewers retain 95% of a message when they watch it in a video compared to 10% when reading it in text. I do have to agree that I retain better when watching a video, but I always prefer to have it as a text option on top of a video in case I’m in a situation where I cannot open or play a video. Or if I don’t have the patience to watch a video, if I’m multitasking or doing a bunch of stuff, or if I’m running errands and doing other things It’s hard to watch videos.
So [00:04:00] what does this mean exactly? We need to make it a priority to optimize the user experience and improve accessibility and make better video on the web. So as a develop, How can we easily do that
with adaptive bit rate streaming, also known as avs. ABS is a technique used to stream multimedia over http. When you load the video or live stream, it will automatically detect your bandwidth and CPU capacity in real time and it will automatically adjust the quality of your video. The method of streaming over HTTP is when the source of the content is encoded at multiple bit rates and it will know which one to select in real.
Why would you want to implement ABS tier video? It’ll load a lot faster, which is always nice. [00:05:00] There’ll be less buffering time, which will prevent user dropoff rates and it selects the quality automatically for a better user experience. And of course, accessibility. So a Tldr ABS is basically when you load a video, a live stream or an on-demand video, it automatically adjusts the resolution a bit rate to fit what your computer and internet can.
That’s like the easiest way to describe adaptive bit. Read streaming.
Here is an example of an on-demand video with YouTube with one of my favorite developers ever, Laura Gift. If you’ve seen her on Twitter, as you can see at the bottom, the red indicates the video plane. If you can see at the bottom left, I circled the red part and the light gray. The second circle is the video ready, buffered, and ready to play.
So if the video is playing faster than it can buffer, then you’ll experience the [00:06:00] video freezing or being very choppy as it tries to keep up with your bandwidth.
Here’s an example with live stream. Twitch has integrated abs where the quality of the stream will adjust based on the individual watching it defaults to auto and will change based on the resolution of your hardware. So I put my cursor, I took a screenshot with my cursor over the tool thing that tells you the different The different resolutions, since I have a 10 80 monitor in auto, it will automatically use 10 80 and also he recorded his stream in 10 80 p, and I can also manually select it as well, so it actually defaults to auto and then I can change it.
On a side note, I went on Twitch to find a random developer, live programming to take the screenshot and ran into a streamer. Grab a D D. There’s three Ds at the end. [00:07:00] He was talking about web rtc, which I found was quite fitting with working with video. And I was actually gonna make a section on web RTC versus HTTP based streaming.
And, but then it gets a bit off topic. So you’re welcome to send a DM or message afterwards cuz I did some research and put information together for that. To keep it short. In summary, HTTP based streaming also known as http, live streaming, also known as hls. So I’ll be using the term. HLS is the best and cheapest alternative.
Web RTC is more designed for peer to peer streaming, and it could be costly, but scales very well. So I’ll skip this slide. So how does resolution work with video Quality Resolution is the number of pixels spread across the display and you’re all tech people, so you probably know the answers to this.[00:08:00]
It describes a number of columns vertically by the number of rows horizontally in pixels. So basically when more pixels fit the monitor, it will be more crispy and clear. There is also aspect ratios to know such as sd, which is four ADP or hd, which is 10 ADP or seven 20 P. Both having that aspect ratio of 16.
Not sure if there’s a better way to say 16 and colon nine, which is like the wide screen style. The four 80 is more more of a square shape. So keep in mind the aspect ratio names as it is useful when implementing abs, which I will show you in the demo.
So how does bit rate work with video quality? Bit Rate is the amount of data encoded for a unit of time megabits per second For video, [00:09:00] a higher video bit rate means a higher quality video requiring more bandwidth. What if you have a 10 megabyte per second download? Speed. And watch a stream at 11 megabytes per second, you will get stuck at buffering because your connection cannot keep up with the amount of data being sent to the stream.
What do you think uses more bandwidth? 10 80, P 60 or 10 80 P 30 10 80 P 60 requires more bandwidth as you are streaming at 60 bit rates.
And as a developer, you may be on a time sensitive project, and if it’s not something you can learn quickly, then it doesn’t get implemented. And I’ve heard this a lot from other developers when I ask Oh, why aren’t you implementing this? Or Why aren’t you doing this? This is due this, We have to get this in.
We have to turn this in by Friday or whatever. And. [00:10:00] And this brings me to showing you how to use an API to add abs to video with a very simple demo. And I made it in a way where you can follow along and I decided I’m gonna use Code Pen. It’s very easy to follow along with. So if you wanna open up code pen.io and I’ll show you how to find information in the docs and throw stuff together from.
Like I mentioned, I’ll be using code pen to demo both of these and yeah I also just recently learned how to work with mugs, so I spent some time in the docs and got familiar with it. So I definitely wanna show that too. And of course, I’m showing cloud. Work for Cloudinary. The two biggest differences with Cloud area and Mox is that Mox is built for specifically using video for developers.
So it [00:11:00] has some very powerful video capabilities with Cloud. It’s built for developers and non-developers as there’s a backend. But it’s a bit of a learning curve and it has a lot of features and is very robust as you can apply transformations in real time, such as cropping or changing the aspect ratio manually with transformations.
We also have AI integrations that do a lot of fun things, such as increasing the quality automatically. Or object recognition and so forth. There’s like a lot of different features on that. Both APIs can automatically generate and deliver all of these representations of your video from a single file and transcode it to either http live streaming or dynamic adaptive streaming over http and pick.
In these demos, I’ll show you in an LS example. Using files for a file for each representation. The index [00:12:00] file, which is the M three eight file, will have the references to the representation file above for the required made data. And I’ll show that too. I found both APIs being a really good experience in completely different ways.
So I would suggest you give both a try or you can try now if you follow along. It sounds very confusing when trying to explain when trying to explain, but it isn’t too difficult at all to implement once you get past the learning curve and understanding the basics. Or maybe I’ve Jed myself and but we’ll see.
So let’s go ahead and jump to it. Let me share my other screen.
Share screen. I probably don’t need sound. There’s an option to share a sound[00:13:00]
window.
Okay, this is confusing. I’m looking for the window to share. Chrome tab. Oh, there we go.
Okay.
Oh no, that’s not showing correctly.
Stream yards is very interesting
there. We. Okay, so now I have 10 [00:14:00] tabs here that I can switch between to make it easier. So I’ll be going back and forth from documentation to code pen. Cuz when I see like code demos, I always wonder like, where are they finding this information? I’m not sure how they’re putting together that information.
So I’m going to actually show where each piece is coming from for it to make more sense.
We’ll start out with the Cloudinary api and you don’t need to set up a, an API key for either of them, for the basics. So I start out with going to the Cloudinary video player documentation. So the first thing you wanna do when we’re doing both demos is like the same process is putting together a your video player.
So you need the video player first. So Cloud has a. And a video player API that we can use. So the first thing we’re going [00:15:00] to do is grab the header information so that way we have the video player Min and the Cloudinary file. Okay, so we’re gonna copy this and it says, And if you see the non-modified and unified differences, it mentions that the light package excludes adapt bit rate streaming.
So we need to pull the standard package. So I think this is the standard package. So I will throw this together here, just like that. And should I be posting these links anywhere? Wonder if I can just copy this link and I’ll put it in the private chat too, where I’m copying information from.
So I posted that in the private chat to be put in the main [00:16:00] chat in case Oh, wonderful. Yeah, I can’t open the comments for the video as it, I have to go through the registration process to see the comments, so I won’t be able to reply. But they are reading your comments if anyone has any questions.
So we did the easy part, the easiest part of it is copying the headers.
and documentation is everything. If it’s not documented, it’s almost impossible to get others to, to work on it as well. We got that part down. Where’s the,
Okay, so the video players up here. So here’s the live example, so we’re going to copy this. And that’s all on the same page. So we’re going to call this adaptive fit rate [00:17:00] streaming Cloudinary API demo, beautiful , and then Paste. So of course there’s gonna be nothing working yet. And then the JavaScript here.
And I’m gonna pace this in the JS section. So this is just a basic video, but since this is using the cloud areas account, I wanna use my own cloud area account and my own cloud area video. So it says cloud and you can easily do that and put your own video here by replacing the cloud name and the file name.
So I’m gonna, Move this away from each other so I can see it easily. And let’s go to cloud. And actually, I think I might have it open somewhere. Yeah. So going to cloud.com looks like [00:18:00] this. And oh, I have to log in again. And then this is my cloud name that shows up here, so I’m going to replace it with my climbing.
And then this is the asset name, which you can find in your media library and you can upload your files here. And I think like the free account is like up to 25 megabyte downloads, if I recall. You might have to double check that. So I found a video online under, and I researched free videos and found a roller coaster and it looked really exciting.
Just the name of the file is All you Need, Roller Coaster and I picked out a 10 80 video for an example. So I will call this roller coaster and that should pull that. Please work. Thank you. So now it’s just a basic [00:19:00] video player. If you see this is just a link to Cloudinary. This is a link to maximize the screen.
And that’s it. Just basics. Aside from the stuff you can add for HTML five video, and now let’s add some extra stuff. So we have the cloud name, we have the demo player. Actually, we don’t need the width part here.
Just checking if it still works. I have to test that for any kind of change. And now we’re going to add a section for options for adding the section for the adaptive bit rate part. And that stuff is built in, so you just have to add the transformation. So we’ll make an option section. And you can find this information in [00:20:00] if you look up adaptive bit race streaming for ry, there’s some code samples that’ll say this information source types we want to use.
I have a weird keyboard, so I don’t have all these keyboard shortcuts that other people have. It is one of those minimal keyboards that have. Like 25% less keys than other people do
So I mess up on my typing a lot. We’re gonna use HLS P four.
We want the video muted because it’ll drive me crazy if it’s not. Each time the video plays over and over again and I hear that loud sound. And then we’ll make the controls show up and we’re adding source transformations. Transformations. [00:21:00] And this is where. We select a streaming profile, and this is this part’s specific to, to Cloudinary for selecting that cannot type.
There we go, streaming profile. And there’s a cloudinary page with the list of streaming profiles. And it’s when I mentioned there’s like full hd, there’s hd, there’s SD and all of that. Full hd, we’ll select that because we want all the options up to 10 80 format,
nicer, oops. Format and three U eight, which is in audio text file that holds all the information and.[00:22:00]
Hopefully that works. Okay. I’m missing something. Hold on. Oh, I gotta do something with options. Of course. I’m like, no. Where did it go? Doc Player. I think it goes after here. Options.
Let’s see. And this is my biggest fear of always doing live demos is things not working yet. So now let me take a look at this. Source types, hls mp4. You did true controls, true source transformations. Did I? Oh I do this every time. I make that plural when it should be transformation. I hope that works.
There we go. So you see how the little toolbar on the bottom popped open. So now we [00:23:00] have adaptive bit rate streaming, so it’s selected on auto. Actually, I should have played the video without it. Okay, hold on. I’m gonna cut this part out and cut this part out just real quick
and then I’m gonna play the video without it. Hopefully it’s not cashed or anything where it plays normal.
Yeah, it’s cashed cuz last time I opened this, it’s Loaded slower, but I’m also on fiber connection, so it’s hard to test that. Let me put this back. Back. And another fun thing is adding playback rates. So I’ll add that so I can do it in slow motion. Oh, actually another interesting thing with with this is I can make the quality.
Automatically increased and I think that might be a cloudinary specific thing too. So let me [00:24:00] change this HLS format and then we’ll add MP four. Oops. Quality auto just automatically do everything for me. Thank you. And then I was gonna, I mentioned I was adding the playback rates, and this is all mentioned in the documentation too.
This is half the speed. This is normal speed. 1.5 is 1.5 times a speed. Two is two times speed. I can do 20 times a speed. Whatever number you wanna put there will work and. Let’s see. So see how that’s showing right here? Half the speed. Let’s do it in slower motion here. And then maybe we want at 180 P 10 80.[00:25:00]
And it’s fun changing it. See how this is one ADP and this is 10 80. And then auto, of course it’s gonna show us 10 adp. I have a 10 ADP monitor. I’m on a very good internet connection. And yeah it’s very easy to do. So all I have here is the, Header information
and the quick little video player here and create a variable to pull my cloud name
and the video player and pulling the video the file for the video player and then the adaptive bit rate options, and. Let’s see. I think I only used one page, but you can also find adaptive bit rate streaming[00:26:00]
and here’s some information in different ways to do it. So this is where I get the streaming profile
and you can see how it works and it can, and it tells you also the Representation streaming profiles. So these are the options you can do 4k. And let me show you that like for example, I am going to change HLS streaming profile. If we change this to just HD now, actually let’s change it to SD and see what happens.
I broke it.
Okay. What did I [00:27:00] do?
Let’s see what happens if I change it back. Maybe it was something else that broke. Oh, I probably have to change the format or something, so I’ll just change it to hd. And that should be up to seven 20 maybe. Yeah, So the HD profile will give you up to seven 20.
Let’s go back to the documentation. SD four three aspect ratio. HD 16 nine, full HD 69.
And you can learn a lot more about it by just going through all the documentation pages, and there’s a lot of blog posts on it as well. So I guess I should save this. And now I will show you the muck demo. [00:28:00] Thank goodness I going faster than I thought I would. So we should have time to do the, I might be slower at it since it’s I’m not as familiar with it.
Let me see. I wanna make a new pen. We’ll call this CFE m.
Okay, so let me close out all the Cloudinary stuff.
andm.iom.com. Redirect. I’ll post that link the one above the original demo ry.com.
So first you log in and. Also, I want [00:29:00] to open up a documentation. So I’m gonna go like this MX video doc. Okay. So this was fun going through, so I like starting from the very beginning, so that way it makes sense. So I’m still wrapping my head around it just as much as you are. Stream videos online. Okay?
The first thing you wanna do is probably. Upload a file stream video files, post a video. That’s what I wanna do.
So in your umms dashboard, there should be a section under video called assets. And this is where you upload. And when you upload an asset you use a post body in j. So basically you just put the file [00:30:00] there. So wherever the file is stored on cloud area, you can upload locally or you can upload from a lot of different options Here.
It’s like a different, completely different style, and I like both methods a lot. It’s just on on preference. So you put the link to your file MP four file here, and I think with MX it’s like up to 10 megabytes for free download. You might have to correct me if I’m wrong. And then you run the request, and when you run the request, it’ll automatically look like this right here.
And then you can open up your MP four and see your playback id, your asset ID, and information. So you’re gonna be needing this here. So here comes the fun stuff back to the documentation. Like I said, I’m a little slower on this side as this is all new to me. I just learned it this week. So we want to put, we want a [00:31:00] video player and
Thank goodness. Thank goodness. Enjoy the learning experience with me. We will go back to the documentation and
let’s see.
Okay, so here’s use video js with mx and actually we used video js for the first time and enjoyed it. It’s pretty interesting. So I’m gonna close out this one, close out this, and I will post this link. This is in an important link right here. Just posted that in the organizer chat. Introduce introduction to video js [00:32:00] kit.
Integrate video js kit. All the information is here. Here is a NPM installation. I am just going to copy and paste the script in the JS file and then the index. So I think this is the information copy,
so I’m gonna copy that.
I don’t think we’re doing any Java script. But if we do have time, I might show you some additional features that I learned with looks
okay. So we have the header there. Now we need the video. We need a video player to make anything work with no video player. Nothing can happen. So I’m going to copy and. [00:33:00] Actually, let me make my title here, Max API ABS video demo,
and then the video player will go there. So we’ll copy the video and we’ll paste it here so you can see the brackets. Asking for your playback id. So this is where we’re going to get that information so we don’t have a broken video back to our assets
playback. Id see it has a playback id, so I probably don’t wanna copy the full url. I just wants the ID copy and. No, I probably need the url. We’ll see the url.
Okay,[00:34:00]
maybe I need to change the type to made note of MIG url.
That’s the part I’m confused on that. I’m still learning. I still have a lot to learn. We’re not all experts on everything. Is like the different types the mime types or meme types. So that is working video file. Oh, I had one more thing I wanted to show on the other demo, but I’ll do it after this one.
So let’s go into the source the developer tools,
more tools, developer tools. Network. [00:35:00] Oh, can I have this on the bottom please?
Bottom. There we go. Okay.
Let’s look at the file. I’m actually looking for it right now.
Control R to Reload. So let me save it first. Oh,
here it is. M three U eight file. So I wanted to open that and show what that looks like. Let me make this bigger and the smaller. So when you [00:36:00] upload a file with mugs, it defaults to an M three U eight file. I’m still trying to remember. M three, U eight, I think M three, U eight. Let me check.
M three U eight, and this is the information text file that pulls the original asset and changes it on the resolution and. And other information. So it says, If your bandwidth is this, then use this code deck and use this resolution. If your bandwidth is this, then do this. If this.
So this is where that information, So the easiest way to describe it is like the video information file, audio, video, audio information file, and video js is HLS is built in. You won’t see options to change it. That’s something like withm, everything is like broke into pieces and you have to use a different API or plugin of your choice [00:37:00] to Intel implement additional features with that.
So I actually was reading about video js resolution switchers, and it took me a while to find those keywords to figure out like, how can I make, how can I show A section where I can change the resolution. So let’s close this out and close this out and
let me open up the get repo
get of.com. The name is K M O s K W I K, I think theories. So after I learned how to use this, I realized it hasn’t been updated in a while. Video js resolution [00:38:00] switcher, but I’m sure there’s like a lot of other different resolution switchers as well. Oh, perfect. I will definitely use that. I will use the last 15 minutes to show how to change the resolution, and I’m sure there’s better ways of doing this, but this is what I was able to learn pretty quickly and I enjoyed learning too.
So I took this. And went through the documentation to, to add a resolution changer. So right now it’s automatically doing it behind the scenes for changing the resolution based on your bandwidth. But you can’t manually change it. So using some kind of like plugin or external tool, you can do that.
So I’m going to make a different section called manually change resolution, [00:39:00] and we’re going to put a different section.
We’re going to make a video HTML five video, and I’ll just call it Tessa Claire for now.
And this is where we should probably put like a class no v gs class. And there’s a whole list of skins that you can use for your video player.
And now we need the source.
And this is where we pull that box asset. Again, my nose is running from allergies. [00:40:00] Let’s go to login, go to video and assets. So interesting thing about uploading files is if you want it to have MP4 capabilities, you have to put it in the. The body. So this is what I had to Google Max. Upload asset MP four.
Download your videos. Enable MP four support. So this is what you have to add is MP4 support standard. So this is what I did. I copied this, went back to the. I went to create new asset, went like this, and then I grabbed my URL and then deleted this part. And basically you have to add this to be able [00:41:00] to use an MP file.
So I ran the request and then this is where I. This as well. So you see the two same videos because the first one I didn’t put MP4 capabilities in it, so I wasn’t able to do the second part. So I had to redo the So this is where, so this is like the file here.
Just testing the file here. This is where you, I can go. I P four,
so
I think
Do source
post that here. I wonder if [00:42:00] low works. Hold on. I have to try that.
Hello? Wonder if phone is a word. So there’s probably somewhere in the documentation that tells you what words you can use here. Medium. Is that one? Oh it is. So I’m just gonna do hi for each one cause I’m not sure which ones to use. And then I remember reading in a documentation you can do slash SD for the type.
And then each one I’m gonna put, it’s like a MP four video type, and then you can add the label as well. So four ADP is a label with a resolution of four 80 and.
So on. [00:43:00] Okay, so we need to add our headers up here too. So let’s look for that real quick. So I actually have it copied somewhere. One second. I had to, it didn’t give me like easy URLs to copy, so I had to copy it myself by going to the gi, had the IO version. So
I went and found the JS file here. So now, It should work soon. Let’s see what I’m missing here.
The documentation says to
call out the video,[00:44:00]
just looking through it one more time. Right here. So this is like the only script to use right here. And then this is where it says the video information type label SD P four. Okay. So right here and then we will put hold on. Let me just copy that.
Copy based. And then I named my video as a player. As a player.
This is a model window. Okay, so let’s see what I’m doing wrong here. Source video id. Video Id.
Hopefully I get to finish this part. We [00:45:00] want. We probably have to have the controls too. Controls, and then this is the data set up, which we shouldn’t need any information here at the moment to make it work. And video D source.
Look at this again. High dot MP4 video, MP4 label four, ADP resolution four 80
source video. I also copied some CSS over that. I’m just going to make it easy. See, what am I missing?
Got the [00:46:00] player here. Am I missing any more headers?
Source?
Definitely broke it.
Course. I’m gonna find it later. The server or network failed or because the format is not supported. Okay, so maybe it’s an issue with the format. If I just do that. Oh, okay. So something’s working.
But the CSS is all messed [00:47:00] up.
Let’s see.
Let’s do another class. Class. Video js and video js. Default skin. Maybe that’ll fix it. Okay. Progress. So let’s see if anything shows up on the right. Not yet.
Let’s do the other ones. Let’s do source. And then I’ll debug it from there if we have time. So when you have 4 80 10 AD P
10 adp?
No, the source file’s working since it’s showing up. And then we’ll make 1 [00:48:00] 44 p.
And using resolution 1 44 P.
Oh, there it is. So see, the toolbar showed up and there’s 1 44, 4 81, 10 80. This is backwards and driving me crazy. So I’m going to switch this out to go to the top. So I think I’m supposed to change what it’s pulling from maybe. This is where I put low. Maybe this is where I put medium. I’m not sure.
Let’s find out what that looks [00:49:00] like. 1 44 P. Four adp. 10 adp. I’ll just keep it like that for fun. So now you can switch it and if you want the automatic option, that’s probably additional. Coding in that. So you can probably just fork the repo and edit and update it yourself, or there might be different options for this.
But I thought this was like easy to learn cuz it’s documented with examples that hasn’t been updated in five years and I only figured that out and noticed that right after I was done. So that sums up all of that. Hopefully I have 30 seconds. I want to go in and try one more thing, and[00:50:00]
with a Chrome developer tools. So if clicking on network.
So much going on this page. Let me see, to make it bigger.
There we go. Here we go. Rollercoaster. So you can see this information too in the M three U eight file. You can also see the.
Yep. So similar TomX where you can see that data here. So yeah, Chrome Developer Tools is your friend. And yeah, that is it. I will, I think everything is saved, so I’ll go ahead and [00:51:00] post the links here.
And then I’ll grab the other link too. I’m done. I’m just posting the links public. And then here’s the max one. Awesome.
Suze Shardlow: Cool. Thanks so much Tessa for that. A really great demo. I love the way that you did it right from scratch. Went into, started with nothing, built it up. And I admire you so much for doing a live demo cuz I definitely am not brave enough to do something like that.
Tessa Mero: I’m definitely not either. But I decided, but I put in enough time to know where to find everything in the documentation. So as long as you know where it’s at in the documentation, you can’t get too stuck for too long.
Suze Shardlow: That is definitely a pro tip, and I know there’s a few folks in the audience who are looking at content creation learning in public, and that is definitely what you did today.
Tessa Mero: Thank you and hopefully this helps others [00:52:00] to implement abs and don’t be specific to one option. Check out all the options and see what you can learn the best and what’s easiest for you and what works for you.
Suze Shardlow: Definitely. We don’t have any questions from the audience today, so I just wanna thank you again for coming and speaking to us about that and that yeah, we’ve dropped all the links in the chat, so anybody who wants to follow along with Tessa can do the chat will be there on the recording as well, so you can definitely do that afterwards if you want.
TheJam.dev is a 2-day virtual conference focused on building real-world applications using the Jamstack.
TheJam.dev is a 2-day virtual conference focused on building real-world applications using the Jamstack.
TheJam.dev is a 2-day virtual conference focused on how to build modern web applications using Jamstack, serverless and more
TheJam.dev is a 2-day virtual conference focused on how to build modern web applications using Jamstack, serverless and more
TheJam.dev is a 2-day virtual conference focused on building real-world applications using the Jamstack.